
Before you hire an addition or ADU contractor in the Boston area, take time to vet your options thoroughly. Use both personal referrals and online research to ensure you choose a company that is reputable, experienced, and the right fit for your project.
Getting a referral from a family member, neighbor, or friend is a great starting point — but don’t assume their positive experience guarantees the same outcome for you. Ask when their project was completed and who they worked with directly. Was there a dedicated project manager? Identify the key team members involved in their remodel and confirm whether those same people would be assigned to your project. This ensures you are evaluating the contractor based on current staff and capabilities, not just past reputation.
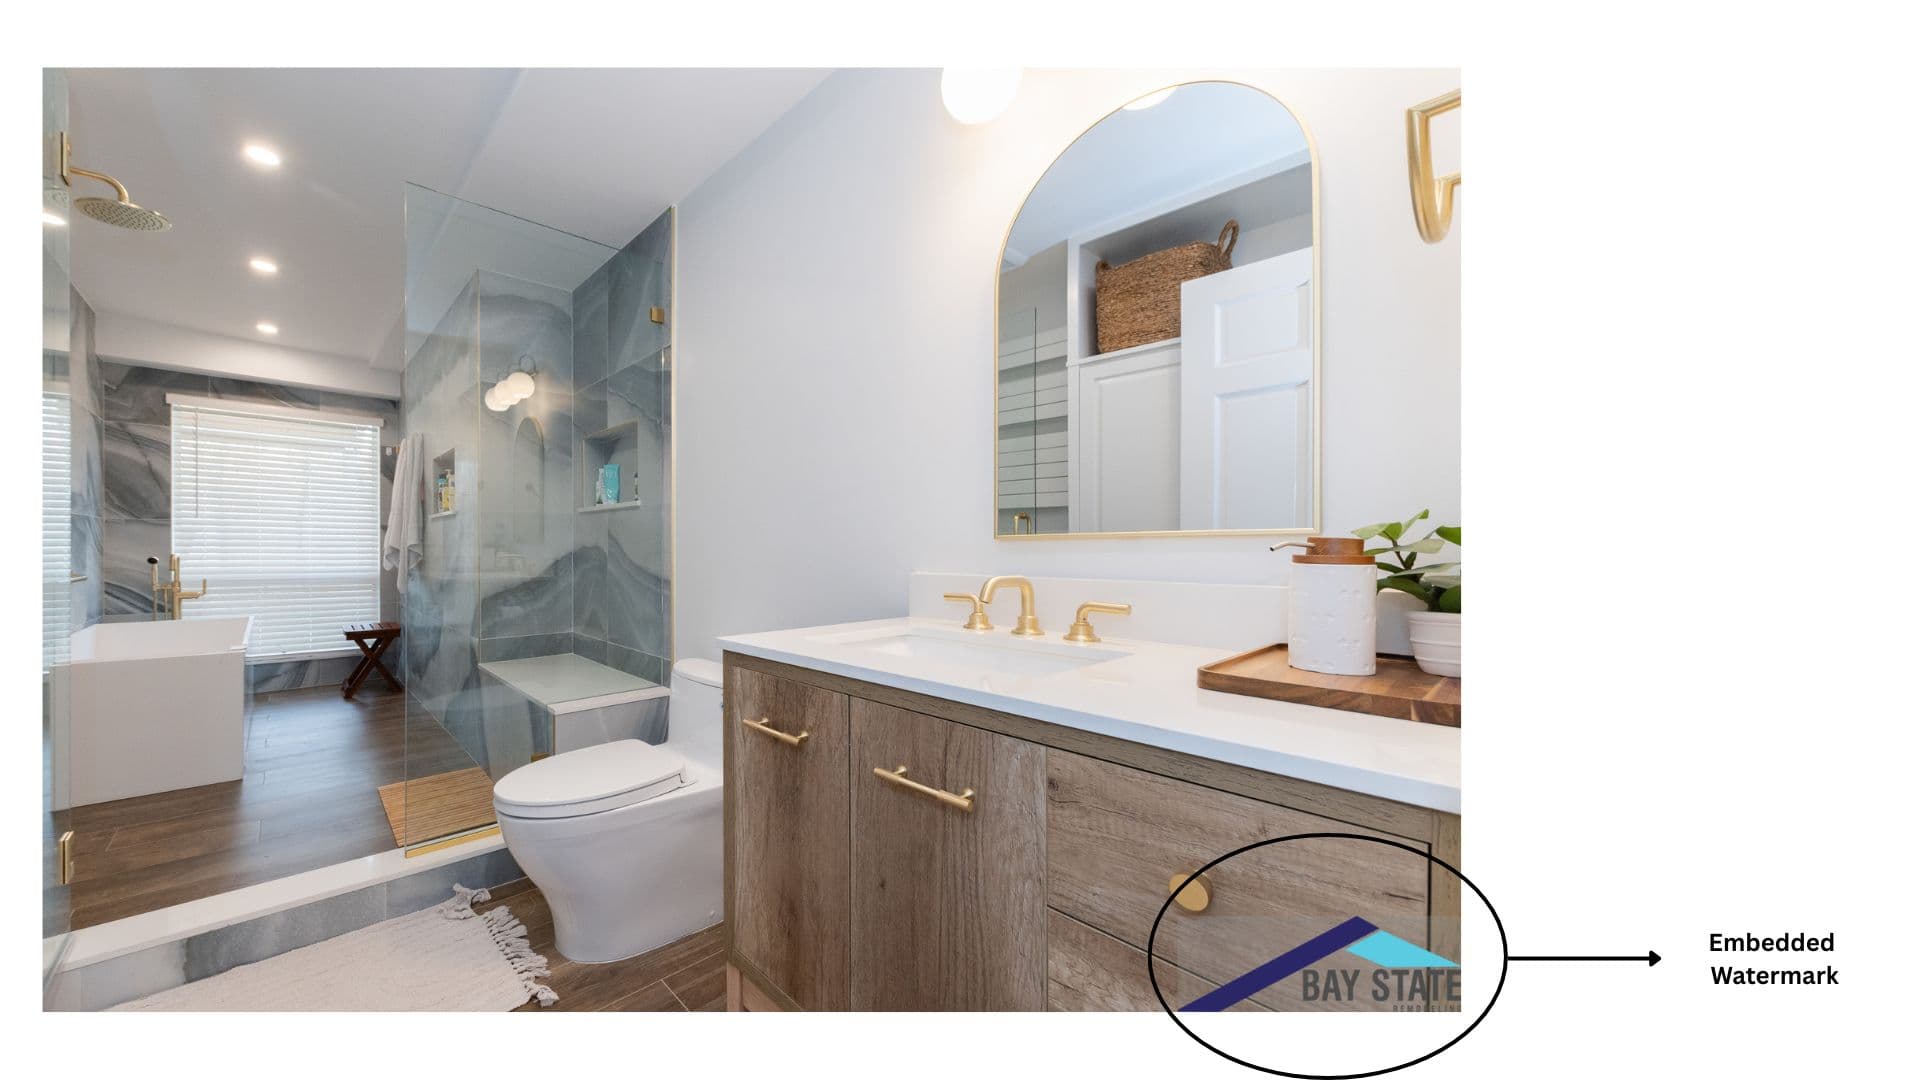
A professional website with attractive photos and persuasive text can be impressive — but appearances can be misleading. Look for signs that photos are authentic, such as embedded watermarks, company logos, or project location details. Be aware that some companies use stock images or even copy content from other businesses. Always verify a contractor’s portfolio and make sure their work is genuinely their own.
Reviews tell you what to expect when something goes wrong — which matters more than what goes right.
“We originally hired them to work on two bathrooms, and once we saw what a good job they did, we hired them to basically redo our whole house. We are very satisfied with the result, and we would hire them again in a heartbeat.”
Bartlett Crescent Client
Google Review
“Not the cheapest, but you get what you pay for... Bay State workmen went the extra mile to get it how I wanted. Altogether satisfied with the job.”
Bathsheba G.
Google Review
When choosing an addition or ADU contractor, insurance is non-negotiable. At minimum, the company should carry:
Always request a Certificate of Insurance (COI) issued directly from the insurance provider — not just a photocopy. This confirms coverage is current and valid. Contractors unwilling or unable to provide this should be avoided.
| Insurance Type | Required For | Minimum Coverage |
|---|---|---|
| Workers' Compensation | Any business with one or more employees | As required by MA statute |
| Commercial Auto | Any business owning or leasing vehicles for work | MA compulsory auto minimum |
| General Liability | Standard for remodeling work (not state-mandated) | No MA minimum — reputable firms carry $1M / $2M; request a Certificate of Insurance |
Look for these additional coverages — they signal a serious operation.
Two credentials matter in MA: the Home Improvement Contractor (HIC) registration and the Construction Supervisor License (CSL). Most legitimate remodelers carry both.
HIC #169948
Home Improvement Contractor
CSL CS-110634
Construction Supervisor License
EST. 2007
Massachusetts Operations
BBB
Accredited since 2012
| HIC Registration | Construction Supervisor License | |
|---|---|---|
| Issued by | MA Office of Consumer Affairs (OCABR) | MA Board of Building Regulations (BBRS) |
| Required for | Any remodeling on owner-occupied 1–4 family homes | Structural changes or safety-system work |
| Covers | Painting, flooring, tiling, non-structural updates | Load-bearing walls, additions, roof, structural framing |
| Purpose | Gives homeowners access to MA Guaranty Fund | Confirms contractor qualified for structural work |
When hiring a remodeling contractor in Massachusetts, it is important to confirm that the person listed on the building permit is actually connected to the company doing your project. Many homeowners don’t realize that some contractors or individuals use another person’s Construction Supervisor License (CSL) to pull permits, even though that license holder may have no real involvement in the work. This practice can put you at risk if problems arise.
Every city and town in Greater Boston requires the same general permit types. Fees and documentation vary slightly, but the categories are consistent.
| Scope of Work | Permit Required | Notes |
|---|---|---|
| Building Permit (Long Form) | Yes — Required | Stamped engineering drawings required |
| Zoning Review / Variance | Frequently Yes | Setback, FAR, height, lot coverage compliance |
| Title 5 Septic Review (if on private septic) | Conditional | Required if adding bedrooms — must approve before building permit issued |
| Foundation Permit | Yes — Required | Excavation, footings, pour inspections |
We’ve pulled permits in 18+ Greater Boston towns. Here are real examples from recent projects.
Design & Planning First— your flat Design & Planning fee is the first payment toward your project, not a separate design charge. It buys a full design and a firm Contract price, confirmed within the range disclosed up front. Budget for up to a 10% deviation, as is standard for remodeling.
The flat Design & Planning fee paid on signing is your first payment toward the project total — not a separate design charge (refer to the Proposal for all included deliverables). It initiates the Design & Planning phase and counts in full toward your total project cost when you sign your Contract and proceed to construction.
Signing the Proposal is a mutual commitment: you commit to the project by paying into it, and we commit to delivering a final Contract price within the range disclosed in the Proposal. The Contract confirms what the Proposal promised, now made precise after measurements — it is not a new negotiation. As standard, honest budgeting guidance for any remodeling project, we advise planning for a possible deviation of up to 10% from the estimate, since some conditions can only be confirmed once the space is fully planned.
Additions & ADU projects have too many scope variables for a fixed calculator to be accurate. Instead, we use tier-based investment ranges anchored to two typical project profiles — Average Home Addition (~500 sqft) and Average ADU (~900 sqft) — so you have a realistic ballpark before the consultation.
Investment ranges below reflect scope of work — the physical extent of the project — not finish quality. Within any tier, your final number can still shift meaningfully based on the finishes you select (for example, premium natural stone vs. ceramic tile). Finish quality is discussed separately during the Material Selection Process.
$145,000 – $245,000
Small bump-out addition or interior conversion ADU (basement, attic, or garage to independent dwelling unit) — minimal foundation work, limited structural changes, smaller square footage.
Typical duration
6 to 8 months
$245,000 – $345,000
Mid-size addition (~500 sqft, primary suite or family room) or attached ADU — full foundation, framing, exterior envelope, and systems extension or tie-in to the existing home.
Typical duration
8 to 10 months
$345,000 – $445,000
Large addition or detached ADU at maximum 900 sqft — full new construction with complete foundation, framing, envelope, and independent systems.
Typical duration
8 to 12 months
Within any scope tier, the following five items are the strongest drivers of your final investment. Each swings both the materials cost and the complexity of the work.
An addition tying into an existing home, an attached ADU, an interior conversion ADU, and a detached ADU each have fundamentally different cost profiles. Detached ADUs are essentially standalone small homes with their own foundations, envelopes, and systems.
Full basement foundations, slab-on-grade, frost wall foundations, and pier foundations each have very different costs. Site conditions (slope, soil type, access for excavation) significantly affect foundation work.
More square footage means more foundation, more framing, more roofing, more interior finishes, and more selections. The relationship is roughly linear within a configuration type, but configuration changes (attached vs. detached) shift the entire baseline.
Whether the project extends existing systems (HVAC, electrical, plumbing) from the main home or requires fully independent new systems is a major cost driver. Detached ADUs typically require their own utility connections and separate panels.
For properties on private septic — common in Dover, Sherborn, Lincoln, Weston, and parts of Wellesley, Needham, and Lexington — Title 5 (310 CMR 15.000) is a critical cost driver. Adding a bedroom (in either an addition or an ADU) increases the property's total approved bedroom count, and if the existing system cannot handle the additional capacity, it must be upgraded before a building permit will be issued. Septic upgrades can be a significant cost driver, and on constrained lots may not be physically possible. Properties on municipal sewer are generally unaffected.
The tier ranges above are planning ballparks. Your specific Proposal is prepared after our on-site consultation and reflects your home’s actual conditions, your scope goals, and your Client Selections at a reasonable budget tier. Your specific schedule will be confirmed during the Design & Planning phase after the on-site Site Measurement & Design Consultation, the Validation Assessment (if required), and the Material Selection Process are complete.
Like investment, the schedule depends on scope tier. Below is the typical duration from Contract Signed to Final Completion Walkthrough — not from the first phone call, which adds the Design & Planning phase before construction begins.
| Scope Tier | Investment Range | Typical Duration (Contract → Walkthrough) |
|---|---|---|
| Basic Scope | $145,000 – $245,000 | 6 to 8 months |
| Mid-Range Scope | $245,000 – $345,000 | 8 to 10 months |
| Full-Scope Conversion | $345,000 – $445,000 | 8 to 12 months |
The durations above measure on-site construction from Contract Signed to your Final Completion Walkthrough. Before construction starts, the Design & Planning phase — site measurement, validation assessment, material selection process, and permitting — adds approximately 6 to 12 weeks depending on scope. The earliest construction can begin is after permits are issued and selections are complete.
Once you have researched your options and decided that Bay State Remodeling might be the right fit, the next step is reaching out to us. As soon as you contact our team, we schedule your consultation.
Before we meet, we’ll ask you to complete a short questionnaire. This helps us make the most of our time together and ensures we come prepared with ideas tailored to your project. This is the Consultation Scheduled step in our project flow.
The first step on site is the Site Measurement & Design Consultation — the first formal on-site visit from Bay State Remodeling after project kickoff.
Our team visits your home to gather critical information about the property, including the proposed addition or ADU location, lot conditions, setback distances, existing foundation conditions where the addition will tie in, existing systems capacity (HVAC, electrical service, plumbing), and any zoning considerations such as Floor Area Ratio (FAR), height limits, or setbacks.
During this visit we discuss your design preferences, functionality needs, and confirm the scope of your project. By seeing the space firsthand and taking precise measurements, we can move confidently into design development.
Validation is a critical part of this phase for addition or ADU projects. In some cases, we’ll recommend a technical validation visit — for example, to assess a structural element, verify a load-bearing wall, confirm roof framing capacity, or evaluate existing insulation and ventilation conditions. We’ll let you know if this applies to your project and coordinate everything for you. If a technical validation visit is needed, we’ll schedule it quickly so there’s no disruption to your project timeline.
With measurements and validation complete, the project moves into the Material Selection Process. This phase has two parts: precise on-site measuring followed by the selection of all finish materials.
Our Bay State Remodeling team schedules a detailed on-site visit to take precise measurements of your home. Accuracy is essential — it ensures every element of your addition or ADU project, from flooring and trim to fixtures and lighting, fits precisely into the design.
During this visit we carefully measure all walls, flooring areas, window openings, plumbing locations (if a bathroom is included), and electrical points. These detailed measurements allow us to prepare a comprehensive take-off for all finishes — a precise list of the materials and quantities needed across every client selection category.
With accurate measurements in place, we move into the selection meetings. Together, we’ll work through all your material and finish selections. Some items are best chosen in person at a showroom or vendor location — and we’ll guide you through that experience. Others can be selected comfortably from home through catalogs, online tools, or email.
This process takes place through a series of meetings held in our sister company’s Bay State Kitchen Gallery showroom, as well as in the showrooms of our trusted vendor partners. Here you’ll have the opportunity to explore a wide range of high-quality options across every client selection category.
While you focus on choosing the styles and finishes that best reflect your taste, Bay State Remodeling takes full control of the Procurement process. Our team handles everything from ordering and tracking to coordinating deliveries, ensuring that all materials arrive on time and in perfect condition.
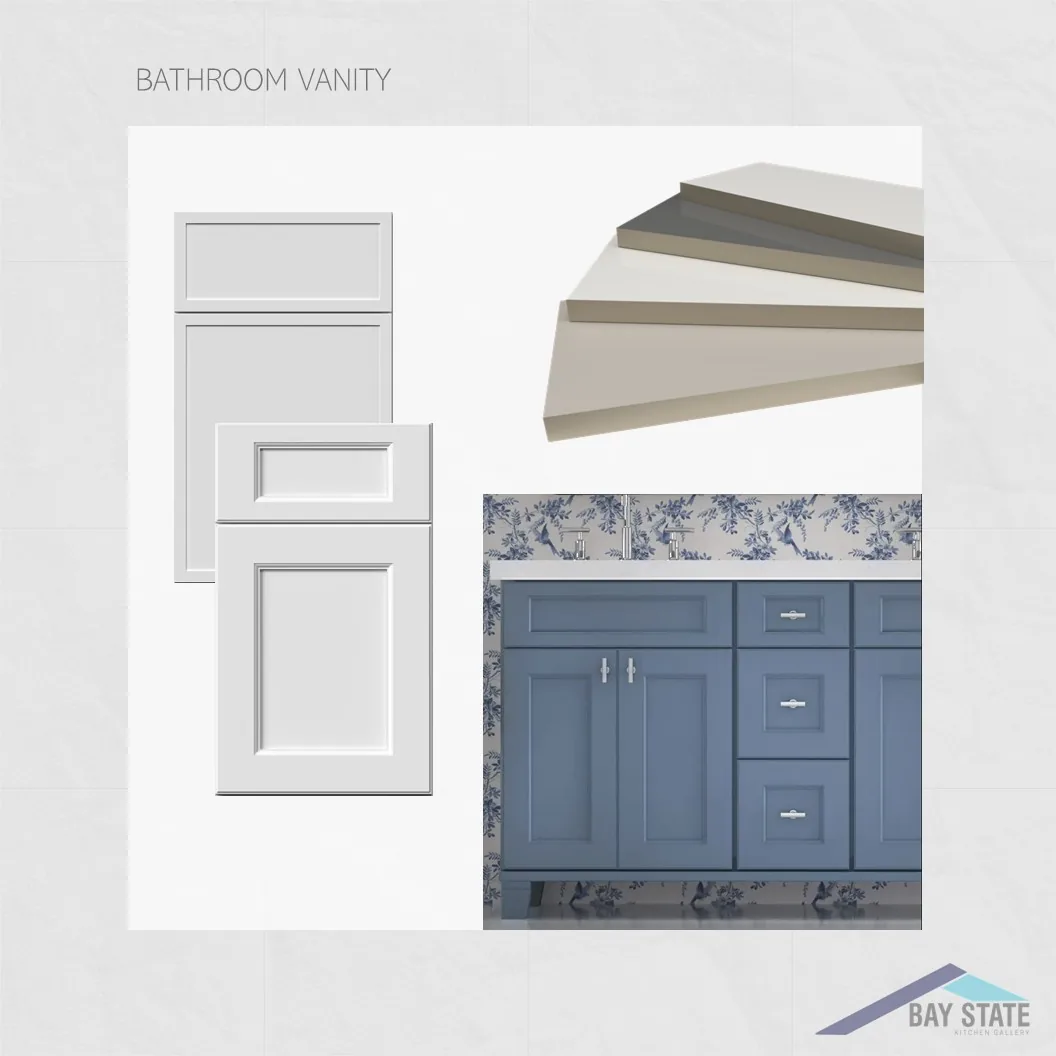
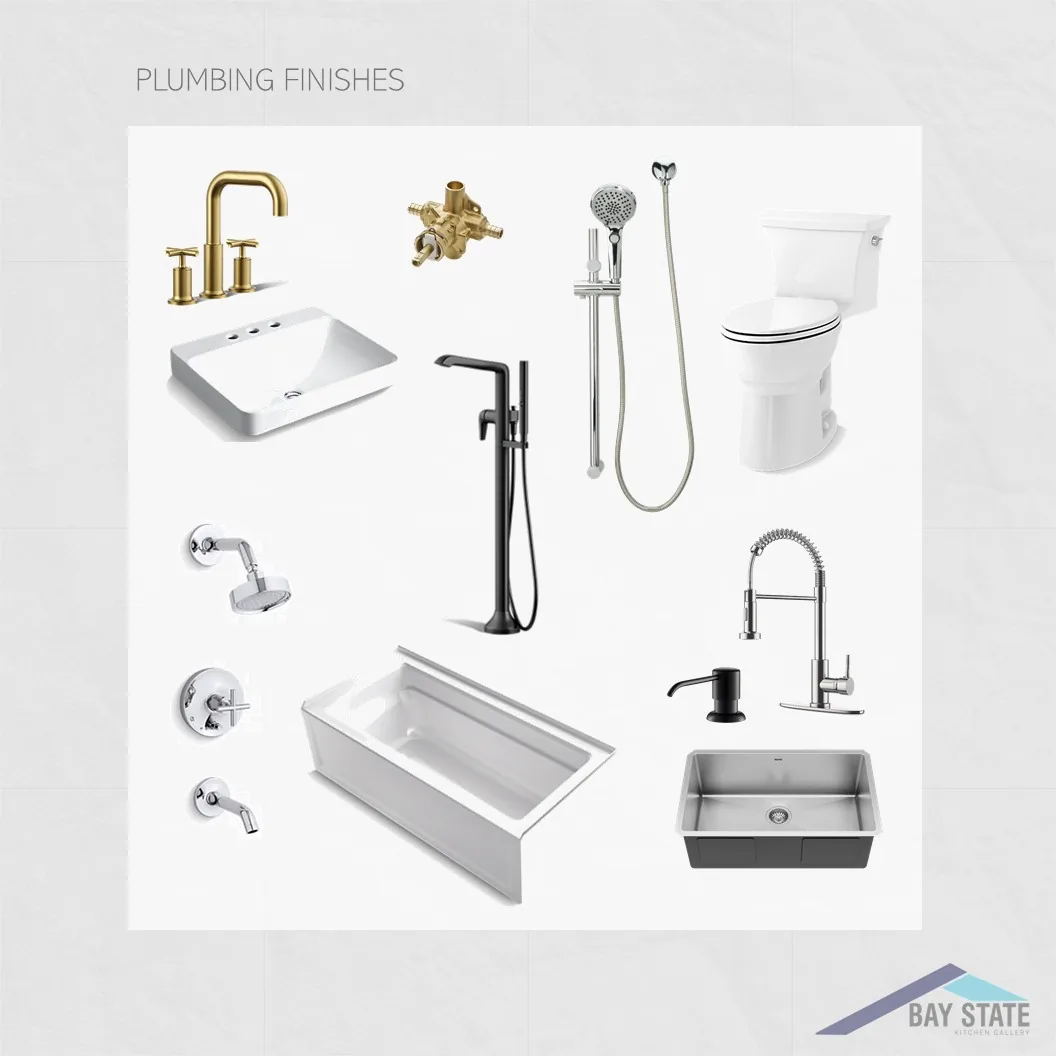
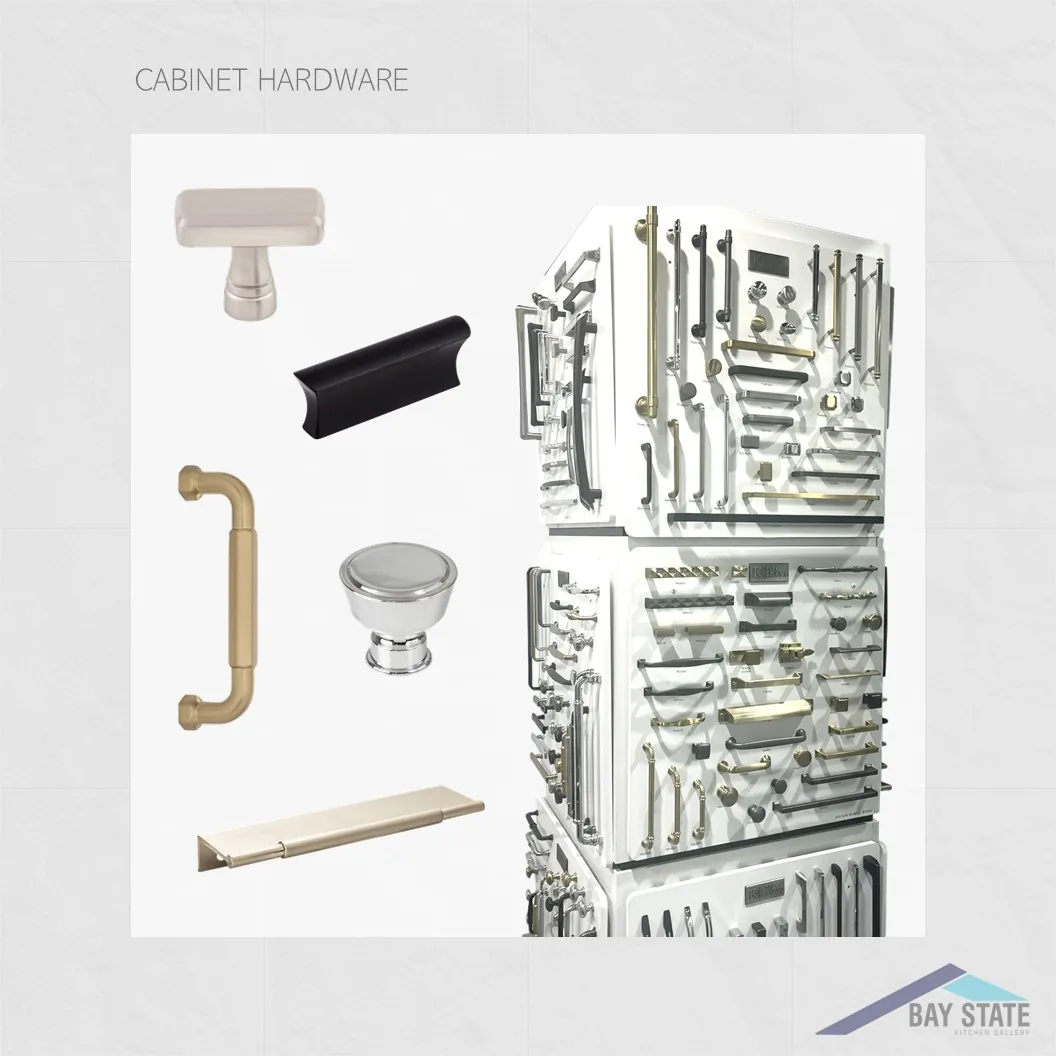
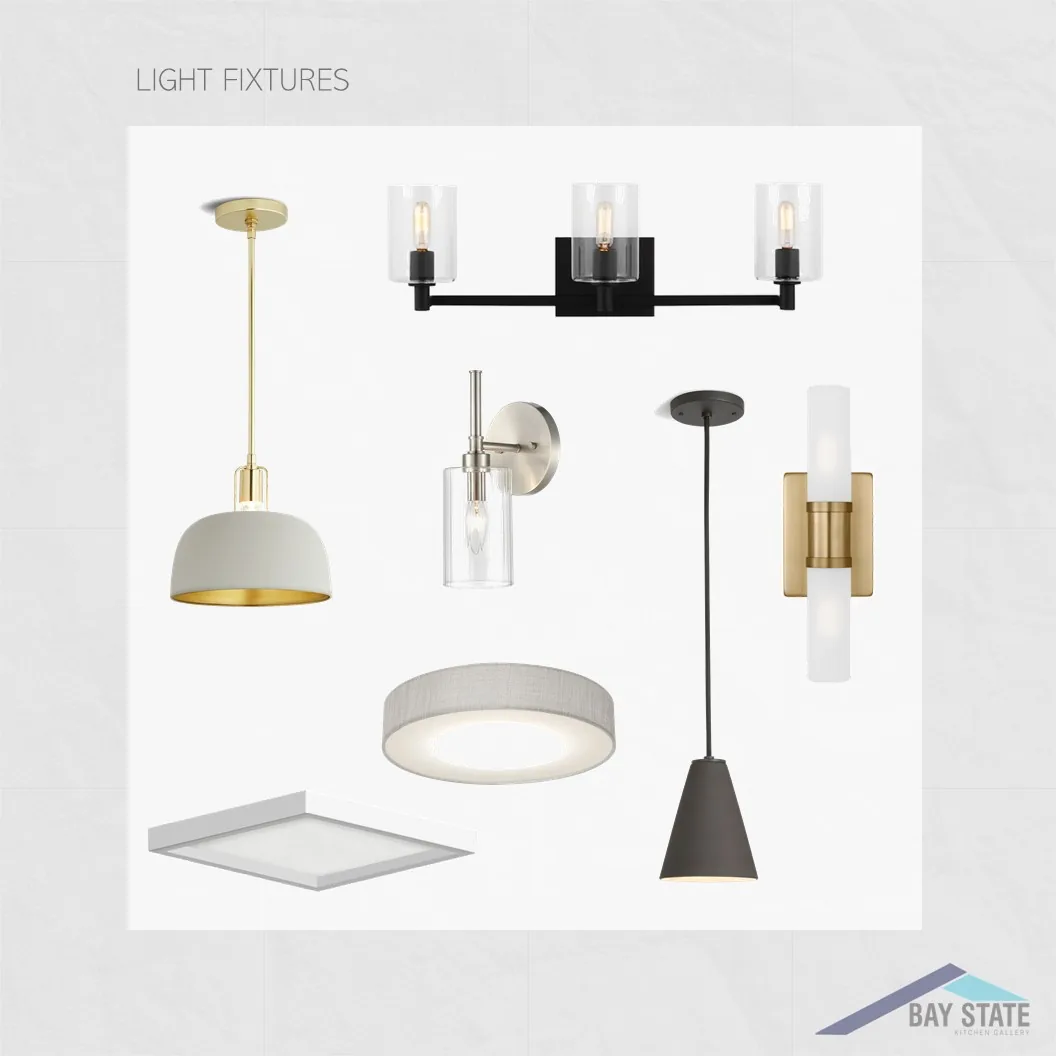
The following categories are completed during the Material Selection Process:
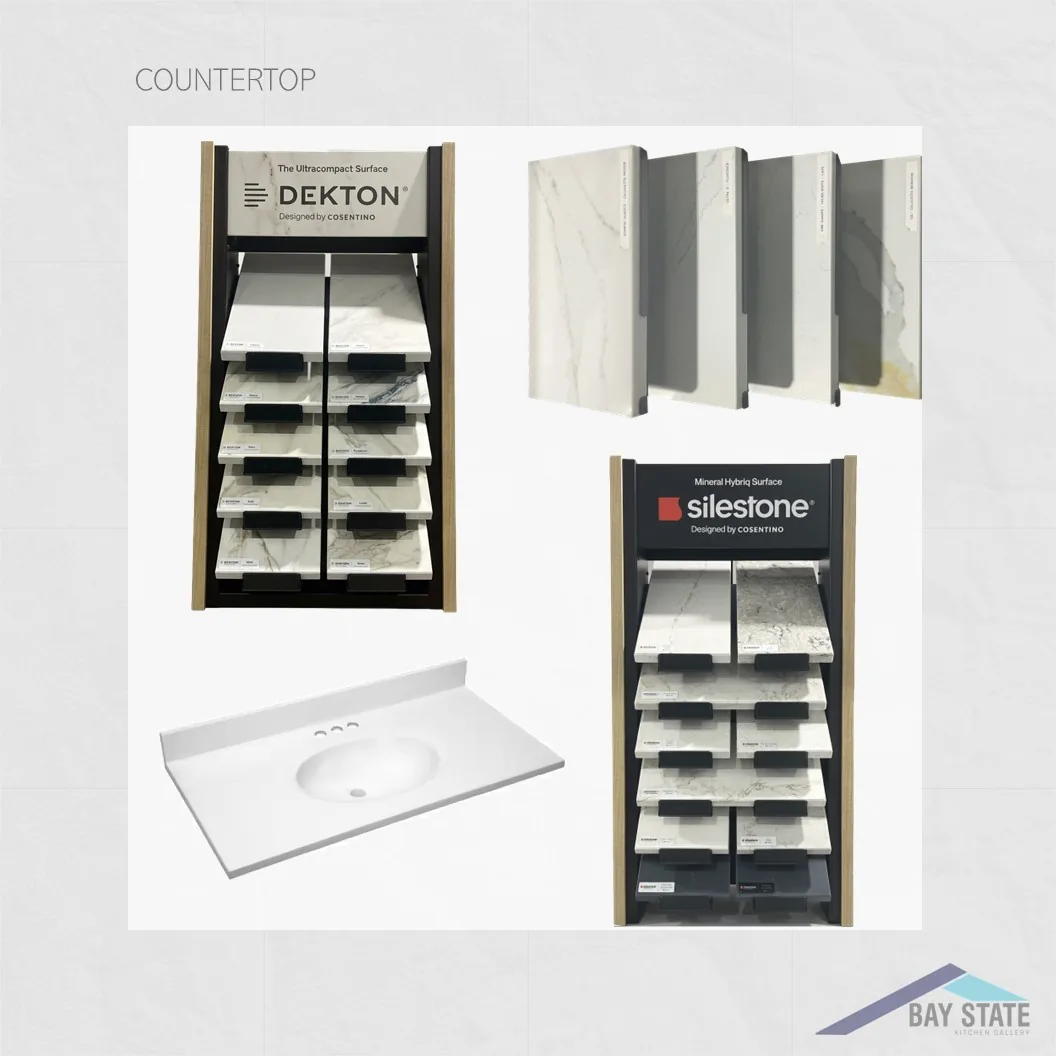
Many selections are made in person at our sister company’s Bay State Kitchen Gallery showroom in Waltham, where you can see real samples side by side.
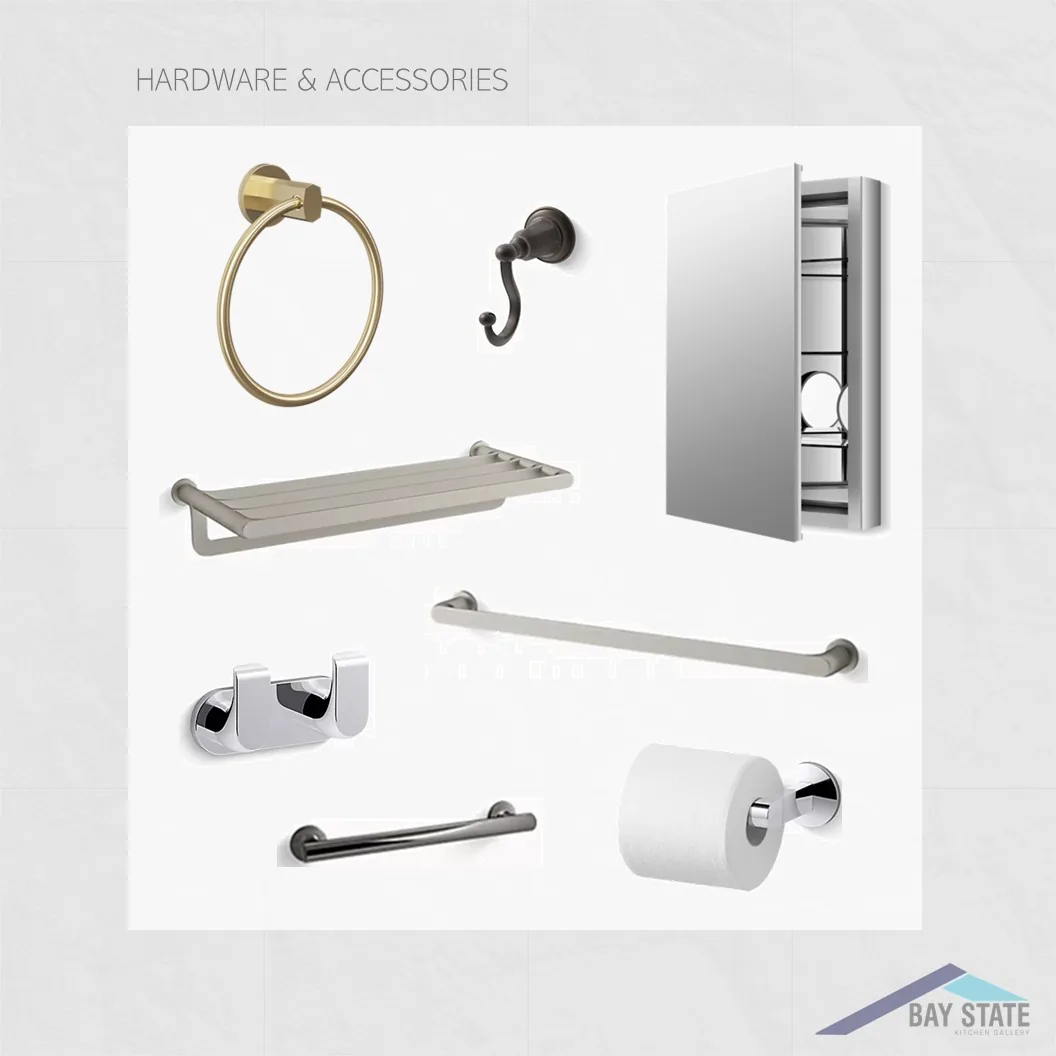
The materials and fixtures you choose during Design & Selections come together across these finish categories.

After the Material Selection Process is complete and the take-off is prepared, Bay State Remodeling moves into Layout Development. Using your measurements, your design preferences, and everything we’ve learned about your space, we develop a proposed layout for your review and feedback.
Once the layout is developed, we move into Design Development & Presentation. We’ll present you with the full design package — including renderings — so you can see exactly how your finished home will look before a single nail is driven. The proposed plan includes the detailed project layout, kitchen and bathroom designs, all Client Selections confirmed, exterior elevations (if exterior work is in scope), and functional improvements tailored to your goals.
During this review phase, you will have the opportunity to provide feedback and suggestions. Whether it is a small adjustment to the layout, a change in a Client Selection, or fine-tuning functionality, we collaborate closely with you to ensure the final design reflects your vision while staying within budget and timeline.
Real examples of feedback we’ve received during the Design Presentation review:
With the final design approved, Bay State Remodeling prepares for the Design & Planning Summary Meeting. Before we move into the Execution Phase, we’ll sit down with you to review the final design, your project timeline, site access, logistics, and payment schedule — and answer any questions you have. We want you to feel completely confident before we begin.
During this meeting, we walk you through the final design layout, confirmed Client Selections, and overall scope of work so you have a complete picture of what your new addition or ADU will look like. At this point, your approval is essential to confirm that every detail matches your expectations before construction begins.
In addition to reviewing the design, this meeting also covers important project logistics:
Following the Design & Planning Summary Meeting, our team performs the Design & Planning Completion Gate — a thorough internal check to confirm everything is in place: all Client Selections made, design approved, Construction Documents finalized, and permits submitted. Nothing moves forward until we are certain everything is ready.
With the final plan approved and the Design & Planning Completion Gate passed, the project moves into Permit Preparation & Submission. This is a crucial part of the process for addition or ADU projects, as most addition or ADU projects require a Long Form permit with stamped engineered drawings due to structural modifications, roof changes, or additions.
At Bay State Remodeling, we take full responsibility for Permit Preparation & Submission. Our team prepares and submits the required documentation, communicates with the local building department, coordinates with your structural engineer, and follows up to ensure approvals are obtained in a timely manner. By handling this on your behalf, we eliminate the stress and confusion homeowners often face when navigating these requirements on their own.
This step also protects your investment. With proper permits in place, you can be confident that your additions and ADU project meets all legal, structural, and safety standards — something that is essential for both peace of mind and future resale value of your home.
Once permits are approved, the project enters Procurement — our team initiates ordering of all selected materials through Payment-Triggered Ordering — and then moves into the Construction phase.
With permits approved and all Client Selections procured through Payment-Triggered Ordering, the project enters the Construction phase. Project Mobilization begins — our crew arrives to begin field work, including site preparation, protection of your home, layout and marking, and demolition.
For addition or ADU projects, site protection is essential. We establish a clear construction zone, protect flooring and pathways throughout the home, and set up dust barriers to contain work areas. If you remain in the home during construction, we coordinate carefully with you on phasing — kitchen work is typically scheduled to minimize disruption to daily life. If you move out during construction, we coordinate scheduling accordingly.
Following demolition, Bay State Remodeling performs the Post-Demolition Review & Decision Gate — we take a close look at what has been uncovered and compare it to the agreed project scope. Additions / ADU spaces frequently reveal surprises: hidden wiring, older insulation, structural conditions, or framing details not visible before demolition. If anything unexpected comes up, we discuss it with you openly, present a change order if needed, and get your approval before doing anything additional. No surprises.
The Execution Phase (Dependency-Driven) then begins. Construction moves forward according to your contract and any approved change orders. Every trade and every service item is carefully sequenced — work only begins on each phase once the necessary materials and prior steps are in place.
Once all Punch List items are resolved, we conduct the Final Completion Walkthrough together — you and the Bay State Remodeling team — to confirm that everything meets your expectations and that your additions and ADU project is officially complete.
Following the Final Completion Walkthrough, we send you a Project Completion & Satisfaction Form — a short form to share your experience and feedback. Your input means a great deal to us and helps us continue to improve.
If you have enjoyed working with us — and we hope you will — we will also send a Review Request & Referral Request. The highest compliment you can give our team is introducing us to someone you care about.
From Bartlett Crescent
“We originally hired them for two bathrooms — once we saw the quality, we hired them to redo our whole house. We would hire them again in a heartbeat.”


